It's like having a magic wand. Guaranteeing a sunny shot even when it's cloudy...

...And would you like some sunshine in that picture? Details in the body text, further down the post.
The images in this post may look deceptively normal. But their creation path was anything but. Whether the surprise was in how they were taken, or what happened after they were taken, these images are proof that railway photography is not always quite as simple as pointing an SLR at a train and hitting the shutter release.
In the rundown you'll find impromptu optical jiggery-pokery, Stonehenge-era detective work, some extremely un-digital restoration, and an almost godlike plan to change the course of the weather! So let's not delay any further. It's time to ascend into the unseen world of unconventional rail photographers' tactics...
IMPROVISED ZOOM
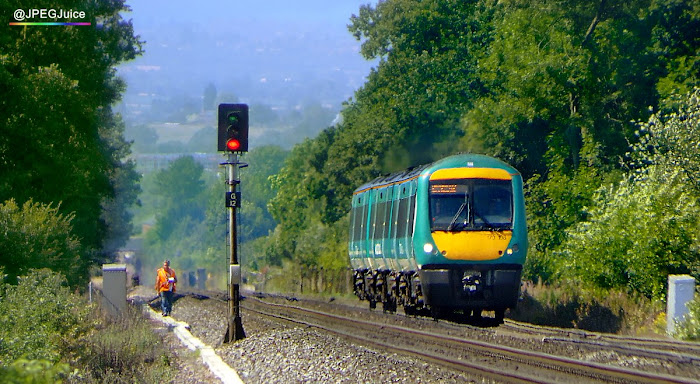
So... What do you do when you have no zoom lens with you, and you want to take a long zoom shot?... That was the problem confronting me at the Lickey Incline on 19th July 2006.
The crazy solution was to use a cheap, compact pocket digicam with a physically small lens diameter, and point the lens through one eyepiece of a pair of binoculars. And as you can see, the binoculars' optics have helped render a pretty good definition of zoom, to preserve 170108 working for Central Trains in a re-jigged version of its original Midland Mainline teal livery.
Most of the distortion is from heat haze rather than lens corruption. The scene is heavily foreshortened, and the backdrop looks deep into the countryside of Worcestershire.
This technique wouldn't have been possible with an SLR, because the diameter of the lens is large, and the frame of the photo would thus include the surround of the binocular eyepiece, etc. But if the camera lens is narrower than the binocular eyepiece, you theoretically photograph straight through the magnification system, and get a zoom shot.
It would be a lie to claim the results are reliable, but as the above shot shows, it was possible to get a serious telephoto effect with an old, cheap, pocket digicam and a pair of binos.
MIRACLE MEDIA REVIVAL
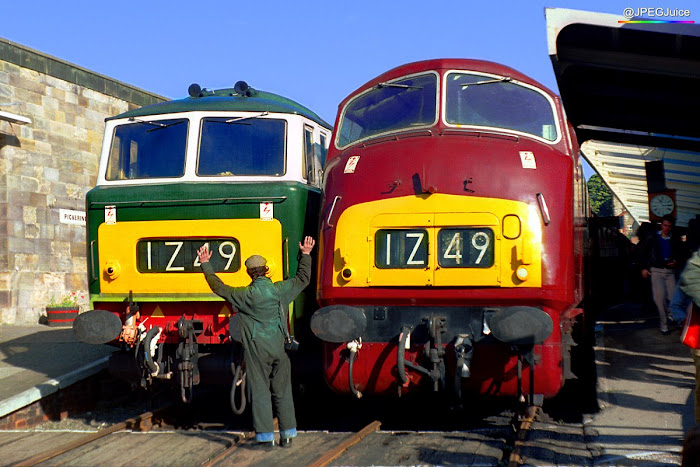
What do you do when you have a heavily scratched 1981 negative and you want a perfect digital film scan?... Film scanners can electronically eliminate moderate scratching, but pronounced and intensive blemishing is just too invasive to invisibly remove... Unless you have a tin of T-Cut automotive scratch remover to hand...
This process carries a serious risk of writing off a negative altogether, so, quick disclaimer - if you do this, on your own head be it. But if you practice on blank film a few times first, and take an enormous amount of care, the results can fall into miracle territory. The above shot of D7029 and D821 at Pickering on 10th October 1981, posing as part of F&W Tours' 1Z49 Yorkshire Greyhound charter, came up as good as new.
The trick is to only T-Cut the shiny side of the neg. Never the matt side, which is the emulsion side. Use high quality tissue paper for the polishing process, and wet the tissue with water before applying any T-Cut. Soak the neg in water before you start, and place it on clean, soft, damp cloth.
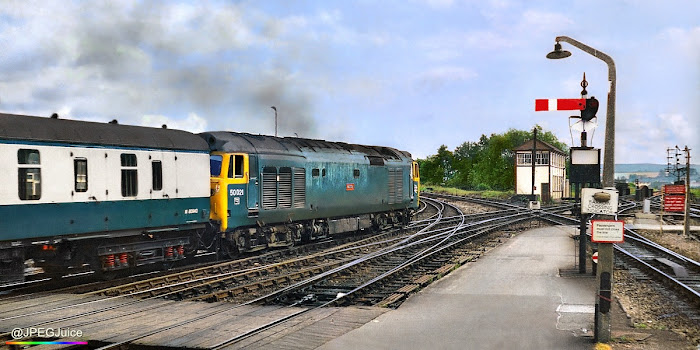
Another triumph for T-Cut. Restored negative capturing 50021 'Rodney' departing Exeter St Davids on 4th July 1981.
The greatest danger is that the negative will scrunch up and kink as you rub its surface. For this reason, try to keep a finger/thumb on both ends of the strip to hold it down firmly, and don't rub too hard.
Once you feel you've polished out the scratches on the shiny side, wash the neg strip thoroughly in a solution of water and Fairy Liquid, then rinse it until you can feel the shiny surface is squeaky. Dry the strip from the matt side with a hair-drier on a luke warm setting. The goal here is to quick-dry the emulsion side evenly, before any drips or patches have chance to set and create lines, globs or colour divides.
Once the matt side looks matt again, and has no sign of patches or drips, allow the strip to dry thoroughly at room temperature for a few hours before scanning it. Letting it dry out fully is important, as the wet affects the emulsion's colour rendition. You'll probably get a colour-cast unless the strip is thoroughly dry.
And any scratches on the emulsion side - the side you didn't T-Cut? The surface profile of the emulsion side reforms when wet, so should flatten out on its own as long as you prevent drips or drying patches from forming. Get it right, and it's like scanning a brand new negative.
RETROSPECTIVE COLOUR
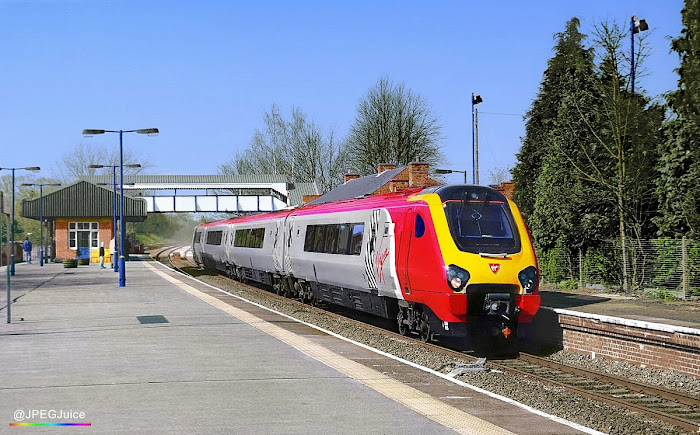
What do you do when you took a photo on black and white film and you want a colour image?... You can colour it digitally, as I've done with the early Voyager shot above. This takes a lot of practice to get right, but once you know the technique, you'll never again have to go through the eternal pain of wishing you'd taken an old photo in colour.
To colour in black and whites, I primarily use a 1990s editor called Kai's Photo Soap, which now has to run inside a virtual machine such as VirtualBox, because it's incompatible with modern computer operating systems.
It uses graphic-equaliser-style colour tools and is both brilliant and fast for colour work. Because you're introducing colour in greyscale bands, it's possible to add yellowy-green to a dark area such as trees, without affecting an adjacent light area like the sky. And vice versa. Soap also lets you paint on your changes with a brush - no layers required. This prevents the green from the trees appearing in other dark areas of the photo.
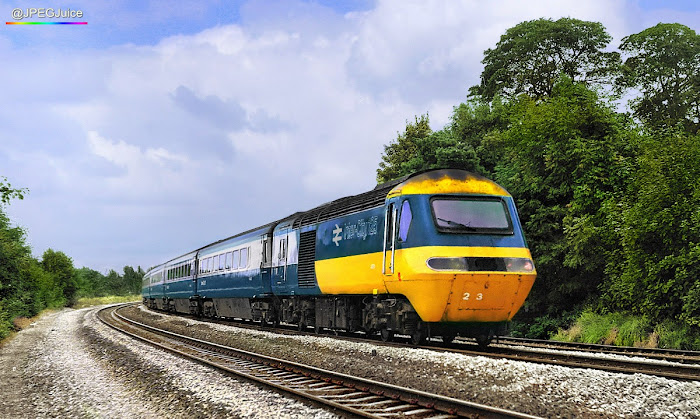
Here's another monochrome transformed with digitally-rendered colour. 43175 in its original Rail Blue days nearly four decades back. Originally shot on Boots Panchromatic.
To produce convincing results, you need to spend time observing lots of colour photos. Noticing the subtle variations in the greens of the trees, the way yellows in the train's livery often look more orangey in darker sections, the way reflections take on the colours of the reflected entities, etc. Notice in the front coach windows of 43175's train above, the reflection is the same colour as the greyish-blue cloud. Touches like this persuade the eye that the colour is natural and not manufactured.
For me, colouring a black and white rail photo is normally a three-stage process, beginning in Soap's Tone Room, where a watery impression of colour is added to each substantial area of the frame. Work then moves into the Color Room, which allows targeted saturation boosts, and various painted-on hue-shifts, which blend the colour correctly with areas of light and shade.
Finally, the isolated details are coloured. For example, the bright red surround for the power car's cabside fire point, the white or silver relief for its numbers and branding, etc. I'll normally do this in a more conventional, modern editor, which permits smart selections.
It may sound complicated, but the fact that most of the task can be accomplished with a fairly crude, 1997 photo editor shows that it's really more about observing colour in the real world than having a raft of up-to-the-minute tools.
STICK IT WHERE THE SUN DOES SHINE
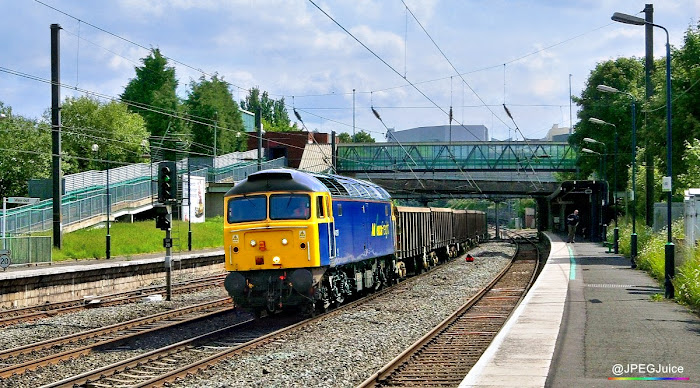
What do you do when you've planned a nice, sunlit shot, and at the last minute, a blob of cloud blocks all direct sunlight and renders the view overcast?...
You photograph the train, hold still, wait until the cloud clears, and take the shot again without the train. This gives you a sunlit “blank”, which can serve as a backdrop for an artificially sunlit digital edit. Like the one above. Yes, 47237 and its Advenza scrap empties turned up just as a cloud blocked the sun, but unless I'd told you that, I bet you wouldn't have known.
It's easy enough to superimpose the train onto the sunlit blank shot as a layer, and tweak the sizing/deformation if necessary so that it perfectly fits the scene. But it's more difficult to make a train shot under cloud blend visually with a sunlit background.
The main ingredient in the necessary changes is an awareness of what happens to a train visually when the sun disappears. The basics are that you lose the shadow, the contrast diminishes, the colour becomes less vividly saturated and “cools off” (becomes more blueish) in colour temperature, and the sky vastly increases in comparative brightness.
Because you have a new sky in your sunny “blank”, the sky itself doesn't matter. But its reflection definitely does. Train roofs characterisitically reflect the sky, so in photos they typically look hugely brighter under cloud cover. The cab windows of a diesel loco often exhibit the same effect - once again because they're reflecting the sky.
To blend 47237 and its train into the sunny background I subtly added some red midtones and subtracted some blue. Then I boosted the colour saturation, and added some blue midtones back in selectively, for the bodyside livery only. I darkened the roof and overlaid some fake cloud reflection on the cab top. It's just a clip-out of some cloud from the “blank”, with the opacity reduced. Because the sunny scene was semi-backlit, I pulled up the highlights on the train's side surfaces, and darkened the front of the loco to simulate shade.
For the train's main shadow (and that's the real convincer in a job like this), you can either simulate it digitally by decreasing the brightness in an estimated area, or you can wait for the next train to arrive in sunshine, photograph it, and simply graft the actual shadow onto your edited composition.
It's easier to do this type of work with semi backlit trains, because when the front of the train is in shade, you don't have to worry about the small shadows created by details such as handrails on the cabfront.
At the top of the post there's a more complex job showing an original photo and its sunlit edit. Note the pronounced difference in colour temperature - far more blueish in the left-hand “before” shot. The sun would have been on the front of Virgin red 47851, so the shadowdrop from the details needed to be added in. It's easiest to template these detail shadows from the front of an identical loco. All in all, the more observant you are, the more convincing you can make the result.
It's like having a magic wand. Guaranteeing a sunny shot even when it's cloudy.
ER... HOT DATING?
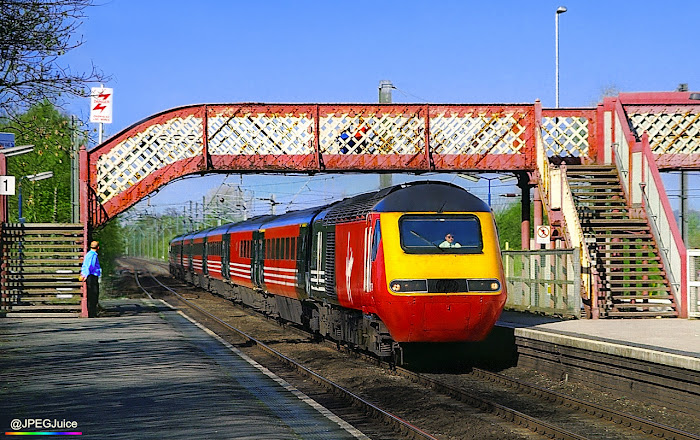
What do you do when you need to know the date on which you took an old, film-era photo, and you never recorded it?... Well, if your photo involved a railtour or an unusual event, chances are the Internet has you covered. But if you instead photographed an item of mundane traffic, all hope is lost, right? Not necessarily. If you took the photo in sunshine, there's an ancient detective process you can use to help figure out when you took it.
Unobstructed sunlight casts shadows, and those shadows measure time. Not only does a shadow rotate like the hour hand of a clock through the course of a day; it also adjusts in length through the course of a year. And although there will be a small discrepancy from year to year due to the leap year principle, generally-speaking you can use shadow-length in conjunction with seasonal information, to narrow down the date window to a given week of the year.
So if you know the day of the week - and if you had a regular day off work you may well do - it's possible to pinpoint the exact day. All that's left then is nailing the year. And if you can't glean that from the image itself, other shots on the same film are sure to give you more clues.
The process of measuring the shadowfall involves revisiting the original location - and you may need to make two or three trips. Budget other shots from the same trip into the process, because the more shadow information you have, the more accurate your prediction will be.
You need to know the length of the shadows from objects of non-variable height, at a specific time of day. You're discarding shadows from objects like trees, because they grow, or are cut, and are thus totally unreliable. You're looking at buildings, long-term structure - anything you know hasn't changed since the original photo was taken.
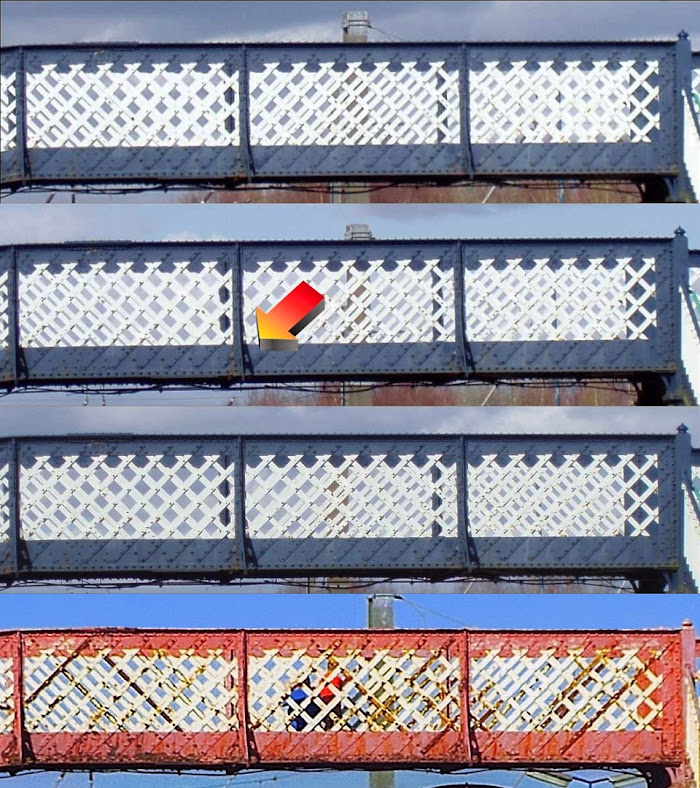
This post is a summary of concepts and not a deep exploration, but to give you an idea of the detail, the above compilation shows how you can use struts on a bridge as a type of sundial, to verify the time of day for a given date. The bottom pic of the four comes from the original HST photo shown under the subheading - taken on 9th April 1999. The other three shots of the same bridge were taken on 8th April 2006, at 15:57, 16:23 and 16:40 respectively.
You can see that the shadow in the original shot best matches the 16:23 time, whose shadow is marked with an arrow. And although less than an hour has passed within the snapshot evolution, there's a clear difference in the shadowfall. You can't mistake 15:57 with 16:40. The shadowdrop looks completely different.
And it's the same with the shadow lengths cast onto the ground over the course of the year. There will be two points in the year at which shadow lengths are the same. But most often there will be different conditions for each of the two points. You wouldn't, for example, mistake 21st March with 21st September. Although the shadow lengths will be the same, one date has bare trees, and the other has green leaves starting to brown a little.
It gets difficult around the summer and winter solstices. For example, shadow lengths will be the same in early June as the are in mid July. But studying a progression of photos on a film will normally help determine which side of the solstice the photo was taken.
No detective process is simple. Within this one, you need to look at a lot of shadows and compare them in conjunction with each other. Their angles and their lengths, across different reliable surfaces. But once all the shadows line up as they originally did, you've narrowed things down to a very small number of date options. And it's an amazing feeling knowing you've recovered a piece of information you thought had been lost forever.